


Incorrect mounting of lockout equipment leads to delays, unsafe shortcuts, and failed isolations. When gear is placed too far from isolators or not suited to the site environment, workers either waste time or stop using it properly. This increases the risk of accidents and breaches during maintenance or shutdowns.
Many sites rely on standard cabinets or kits without assessing whether they match the layout, task locations, or mobility requirements. Equipment exposed to heat, dust, or corrosive conditions often degrades faster when the mounting setup is not appropriate. Sites with mobile teams face added risks when lockout gear cannot be accessed where it’s needed.
Mounting decisions must be based on task flow, equipment use, and physical site conditions. A poor setup often results in non-compliance and slower response times, especially during urgent jobs.
This guide outlines what to check before mounting lockout gear on-site. It covers layout planning, material durability, mounting options, and system expansion. It also links to a related issue that often causes safety failures when implementing lockout tagout systems.
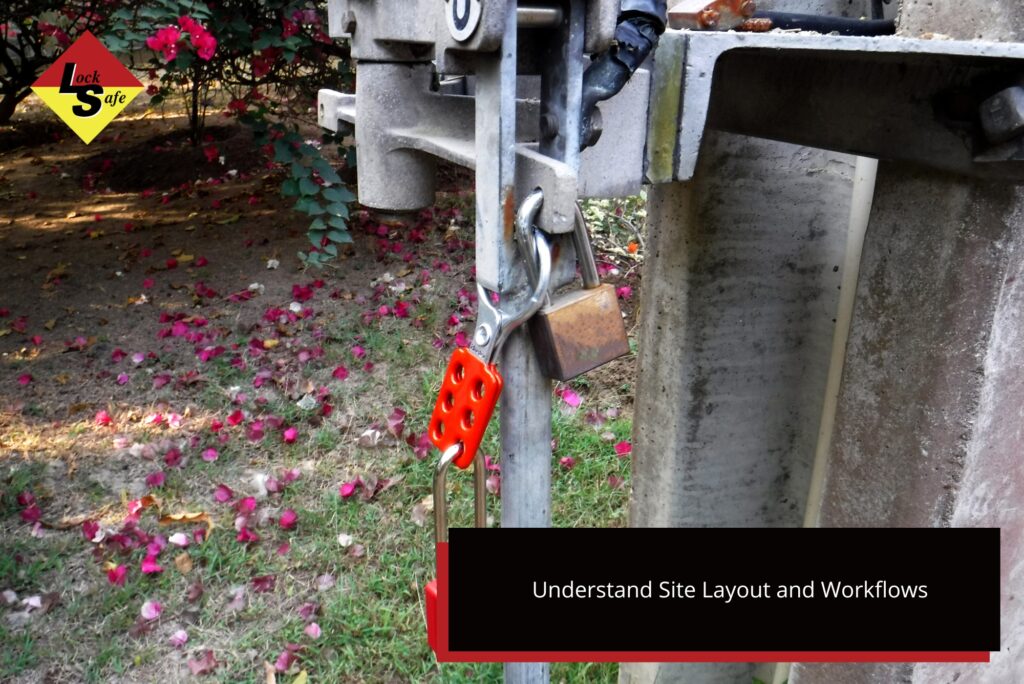
1. Understand Site Layout and Workflows
Mounting lockout equipment starts with understanding how the site operates. The location and setup should match how often isolations occur, whether the work is mobile or fixed, and the environmental conditions present.
Sites with fixed plant or machinery usually benefit from wall-mounted lockout boards or cabinets placed near the isolator. These allow workers to quickly access what they need without backtracking. In contrast, mobile teams or field service technicians often require portable kits they can carry to the job.
It’s also important to consider the physical environment. Sites exposed to rain, dust, corrosive chemicals, or extreme heat will need equipment protected by enclosures or cabinets. Weather-resistant or sealed mounting systems are often required to maintain durability and compliance.
For sites that mix indoor and outdoor operations, it may be necessary to install different mounting styles across the location. Consistency should still be maintained in how items are labelled and stored to avoid confusion.
Many worksites overlook this planning step. Failing to match mounting locations with daily workflows increases the chance of unsafe practices or delays in response during shutdowns.
2. Choose the Right Type of Mount
Different mounting methods suit different worksite needs. Choosing the wrong type can affect both convenience and safety compliance. The best option depends on whether the equipment needs to stay in one place or move with the team.
Wall-mounted boards or cabinets work well in permanent areas like workshops, control rooms, or substations. They allow central access to isolation devices and keep items organised and visible. These are often used where isolations happen frequently in the same location.
Portable lockout kits are useful for maintenance teams that work across various parts of a site. These kits store the same lockout tools but are easier to transport and store when not in use.
Direct-to-equipment mounts are fixed to machinery and allow isolation components like brackets or handles to stay attached at all times. These are useful where space is limited or isolators are built into the machine itself.
For integrated systems, panel-mounted isolators may be embedded within switchboards. These setups require precise planning but offer neat, tamper-resistant solutions.
If you’re unsure what type of setup avoids compliance risks, review this common mistake in lockout tagout systems for added insight.
3. Match Materials to the Environment
Mounting equipment must be suited to the site’s physical conditions. Using the wrong materials can lead to early failure, corrosion, or damage that goes unnoticed until a safety issue occurs.
Stainless steel is recommended for high-risk industries such as mining, waste processing, or coastal operations. It resists rust, handles physical impact, and stays secure even in damp or abrasive environments. In addition, powder-coated finishes improve visibility and provide added protection against chemical exposure.
Indoor or low-risk areas may use plastic mounting boards or lighter enclosures. These options are more affordable and easier to install but are not recommended for heavy-use or outdoor locations. They should only be used in environments where impact, heat, or moisture is not a concern.
Mounting hardware such as brackets, hinges, or lock tabs should also match the same durability as the enclosure itself. A secure cabinet with poor mounting screws can still fail under pressure or over time.
Where possible, review the environmental risks before choosing a material. This helps reduce future replacement costs and ensures the gear stays functional when needed.
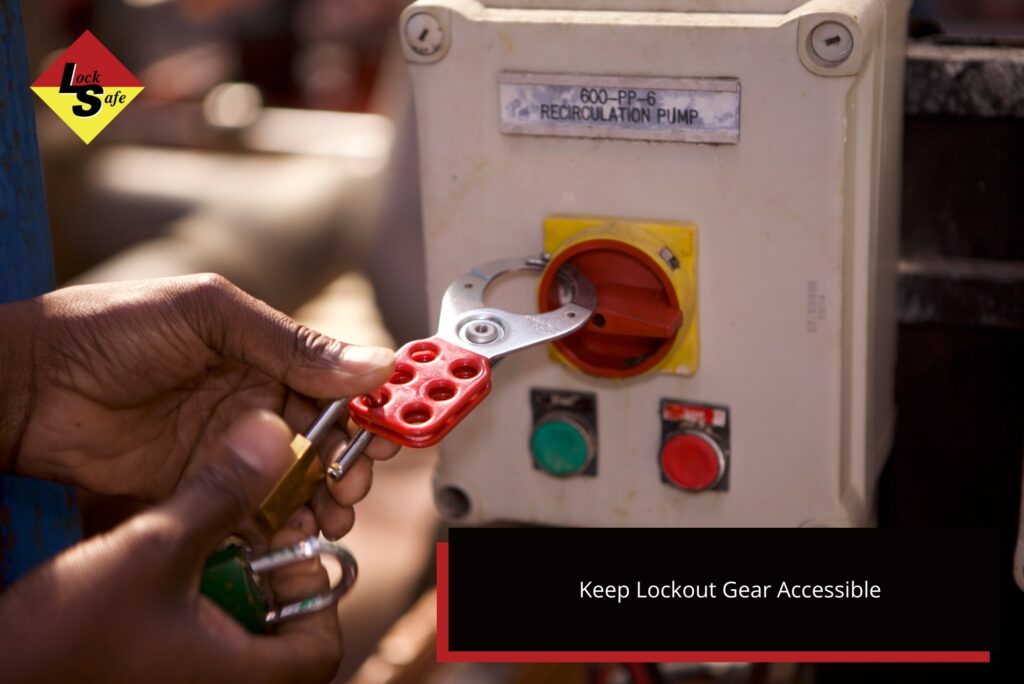
4. Keep Lockout Gear Accessible
Lockout gear should always be within clear view and easy reach of the isolation point. Poor placement, such as mounting behind equipment or far from the isolator, leads to delays and increases the risk of steps being skipped during shutdowns.
Workers under pressure may avoid using equipment that takes extra time to access. Placing padlocks, hasps, and tags directly near the isolator encourages consistent use and helps maintain compliance during audits.
Use labelled boards or cabinets with defined positions for each item. This helps with visual checks at the start and end of each shift and supports accountability. Missing items are easier to notice, and damaged tools can be replaced quickly.
Avoid placing lockout gear near high-traffic areas where access may be blocked. Mounting stations should be installed at shoulder height or within easy line of sight to reduce strain and improve visibility.
For larger operations, multiple lockout access points across the site may be required. This avoids delays when teams are spread across distant work areas.
5. Plan for Future Site Changes
Lockout systems often need to expand over time. New machinery, changes to workflows, or updated safety policies may require additional isolation points, cabinets, or gear types. Planning for this early can reduce disruption and extra costs.
Modular lockout stations or wall panels make it easier to add capacity later. Choose setups that allow extra rows, compartments, or hook points to be installed as needed. Avoid fixed cabinets that cannot be adjusted or relocated once installed.
For sites expecting growth, it’s better to over-allocate space than to run out. Larger cabinets or wall panels with spare capacity can prevent clutter or unsafe improvisation later.
Before installing new gear, consult with the worksite’s safety officer or supervisor. This helps ensure all mounting complies with current Australian safety standards and internal policies. They may also identify other needs, such as extra tagging procedures, cabinet locks, or access controls.
Expansion planning is not just about equipment—it’s also about making sure workers stay familiar with updated layouts and procedures as the system grows.
Built for Harsh Site Conditions
Our mounting systems are built to handle the environments our clients work in—mining sites, manufacturing plants, and industrial facilities where safety can’t be compromised.
We design and manufacture every lockout product in Australia to meet the needs of real worksites. From stainless steel mounting boards to modular cabinets and portable kits, each component is tested for durability, visibility, and ease of use.
If your site layout or risk profile calls for something specific, we offer custom manufacturing to match. This includes mounting gear that integrates directly with machinery or expands as your system grows.
When you choose our products, you get equipment that supports safe work practices, meets Australian standards, and performs under pressure. Look for the stamp to confirm it’s authentic—we don’t cut corners, and neither should you.
For durable isolation gear that works reliably on-site, Locksafe supplies mounting systems trusted across Australia.


